Tuesday, January 31, 2012

Blog Hop: “Love Cast in Clay!”


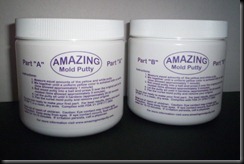
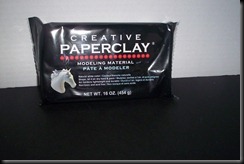
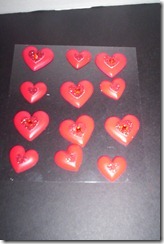
Hello everyone! Thanks for stopping by my blog! I’d love to show you what I’ve made today with Creative Paperclay® and Amazing Mold Putty!  Today I’m going to show you a simple garland made with the mold putty and paperclay. I started out with the mold putty, mixing up equal parts of the putty and then pressing some metal  hearts into it that I’ve had laying around for a long time.

Blog Hop, Love Cast in Clay 006

Blog Hop, Love Cast in Clay 001

Blog Hop, Love Cast in Clay 007

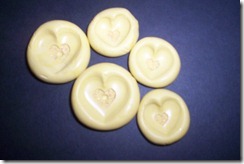
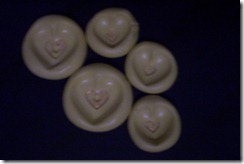
Once the mold was made I pressed the paperclay into it and then laid them out to dry.

Blog Hop, Love Cast in Clay 003

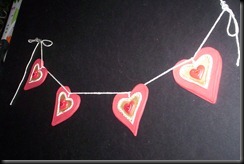
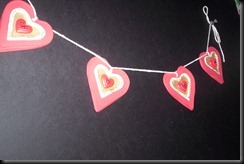
Now that the clay was dry, I painted the hearts, added some small hearts to the center and strung the hearts on some cotton yarn. Now I think this turned out pretty cute don’t you? What a way to show your “Love Cast in Clay”

Blog Hop, Love Cast in Clay 013

Blog Hop, Love Cast in Clay 014

You can mold and make just about anything out of Creative Paperclay® and Amazing Mold Putty! Don’t forget to leave a comment on this blog and remember that you must also be a follower in order to win. The starting spot is Terri Sproul’s and the next stop from here will be :

Gini Cagle

Hop on over to her blog and leave some love!

Barbara

Saturday, January 28, 2012

A Valentine Creative Paperclay® Delight Clay Project

It’s hard to believe that Valentine’s Day is just right around the corner. This project turned out so cute I thought you might want to make something at least similar to it for someone special in your life. To start with I took some little hearts that I had and made a mold of them. I then filled them with Delight Clay, waited for them to start drying and then popped them out to finish drying. (They dry quicker when they’re out of the mold).

                   1-29-12 paperclay post 002               1-29-12 paperclay post 009      1-29-12 paperclay post 010
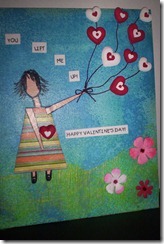
Once dry I painted them red and white. I took an 8X10 canvas board, spritzed it with some paint, used some Mod Podge and attached some green fiber, paper, string, words, flowers and my cute little hearts. Take a look at the final project and tell me what you think.

1-29-12 paperclay post 008
You can change the idea, use the Delight Clay in a different way etc. I’ve got to say this is one of the few times that I’ve used the Delight Clay but have to say it’s great for Mixed Media such as this or for scrapbooking or card making. It is so light weight, it takes detail amazingly and takes paint well.  This project would look very nice on a little stand which is what I plan to put it on.

Don’t forget to join us for the blog hop on Feb.1, “Love Cast in Clay”. We’re going to have some awesome prizes to give away!

Barbara

Sunday, January 15, 2012

Check out these Artsy Blogger Links!!


Beading Arts
Do you struggle to add Swarovski rivolis to your bead embroidery? Cyndi has the solution for you in her brand new e-booklet, "Three Bezels Plus a Bonus"!


http://www.beading-arts.com/2012/01/three-bezels-plus-bonus-is-ready-to-go.html

Creative Dreamer
June is beginning a long running tutorial about creating an art/visual journal... from stuff you already have around the house! Come find out the details, then join in!


http://acreativedreamer.blogspot.com/2012/01/so-heres-what-were-gonna-do.html


Eileen - The Artful Crafter
Eileen's happy to be back in her niche. Have you found yours yet?

http://the-artful-crafter.blogspot.com/2011/07/eileens-back-in-her-niche.html


Keep an Eye Out for Someone Special
Cherie makes a picture with a Chinese fortune.

http://cherieblogs.com/2012/01/11/keep-an-eye-out-for-someone-special/


Mo(o)re Whimsies
Amazing Mold Putty and a Victorian Picture Frame


http://www.barbara-moorewhimsies.blogspot.com/2012/01/amazing-mold-putty-and-victorian.html

Wednesday, January 11, 2012

Amazing Mold Putty® and a Victorian Picture Frame


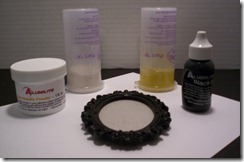
Wow is it just me or has it been hard for anyone else to get into the swing of a New Year? I am however rather proud of the cute little picture frame that I made using Amazing Mold Putty® and also Amazing Casting Resin®. Let me tell you something about these products, there are other brands out there but from my experience I would go for these products every time. These products are just so easy to use!! To begin with I assembled the product I planned on using:

AMP MOLD PUTTY VLVS PAPERCLAY 003 All that you have to do is knead equal amounts of Part A and Part B together  and flatten it a bit and press your $1.00 bargain picture frame into the putty.

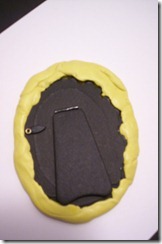
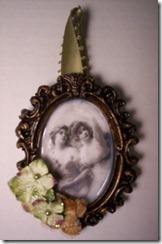
AMP MOLD PUTTY VLVS PAPERCLAY 004 I know you’re thinking that couldn’t really do anything special and when it’s set and you pull the frame out, it looks like this:mold putty picture frame 002 Which is even more unappealing. Once the mold was made I mixed up equal parts of the resin along with some black dye, poured it into the mold and let it set up. It was a fun process and once it was finished I used some rub and buff to burnish the edges. I then inserted a victorian picture that I had and covered it with Crystal Lacquer. I used some Petaloo flowers to embellish along with a ribbon for a hanger. I really like the way it turned out, what about you?

mold putty picture frame 005

Aren’t these ladies beautiful? Do you see all the details that the Amazing Mold Putty® picked up when the picture frame was pushed into it? This stuff really is amazing and they weren’t bragging on themselves when they picked that name! lol Let me know what you think of the project please and ask any questions that you might have about it. You can find these products at Michaels stores and also Hobby Lobby.

Barbara

Sunday, January 1, 2012

Artsy Bloggers Link–Ups for the first week of January!


Hello everyone! Happy New Year to all of you! I hope that your New Year is filled with all sorts of creative goodness! Listed below are a few of the places to start looking for creativity:

Creative Dreamer
June wants to remind everyone of a great project that you can be a part of. Come read about The Butterfly Project
http://acreativedreamer.blogspot.com/2010/09/butterfly-project.html

Eileen - The Artful Crafter
Add beautiful kaleidoscope effects to your hand made cards with iris folded designs.
http://the-artful-crafter.blogspot.com/2011/10/iris-folded-card-craft-project.html

Mo(o)re Whimsies
New projects with Creative Paperclay and Viva Las Vegas Stamps
http://www.barbara-moorewhimsies.blogspot.com/2011/12/new-project-with-creative-paperclay-and.html

Please take a look around and leave a little love behind! (comment)

Barbara