Monday, June 20, 2011

Creative Paperclay Gourd Penguins

From time to time I love to do something totally out of the ordinary and whimsical. I love penguins and thought I would show all my readers how I make a small bottle gourd into a penguin using creative paperclay. Here's what you start with:
Creative Paperclay

I know it seems like not much, I did use a little glue also. I got so excited while working with the paperclay on the one gourd that I decided to do a couple more. I worked with the clay using a little glue to make sure that the clay stayed on the gourds. I made tails, wings, and cute little fat cheeks and beaks. Here's what they looked like after the clay was put on:


Still not very pretty but starting to get some character! I then used a lot of paint and some glitter to make them pretty. After all the painting was done I sealed the penguins with a spray on sealer with a gloss finish:


The glitter didn't show up that well in these pictures but it really gave the penguins a nice look. I then made little hats and scarves for the trio and they really looked good. Voila' and here they are, three little penguins ready to play in the snow. They made me feel a little cooler just by looking at them and it was pretty hot today!


Barbara

Saturday, June 11, 2011

Artsy Bloggers Saturday Linkups

Wow, between getting shots in my back, teaching Gourd Art classes on Saturday and getting ready for a show on the 17th and 18th of this month I've just been super busy. I've got to say though that I'm really enjoying teaching classes on Saturdays. I've had several new students and even had a young man (12 years old) by the name of Ethan today. He didn't think that he could make anything with gourds but he really had a good time and got a really good start on one. He'll be back Saturday after next with his Mom to finish up. Next Friday and Saturday I have a show and so I won't be teaching.


Here's are the wonderfully talented Artsy Bloggers! I do hope that you will check out what's going on with each one of the following bloggers 'cause they are one super bunch:

Beading Arts
Copper tubing makes wonderful beads!
http://www.beading-arts.com/2011/06/copper-bead-necklace-part-one.html


Eileen - The Artful Crafter
Follow this tutorial to make a pretty and practical seed kit featuring seed planting strips
http://the-artful-crafter.blogspot.com/2011_04_07_archive.html


Estate Sale Chairs - Part 2
Cherie covers the seats and starts on the backs.
http://cherieblogs.com/2011/06/09/estate-sale-table-and-chairs-2


Laura - Taz's corner
Mail Art and postcards, plus a big Thank You!
http://tazscorner1.blogspot.com/2011/06/mail-art-and-postcards-plus-big-thank.html

Flowers and Art
Kim is trying once again to finish up unfinished projects. Come see the first one :)
http://flowerkim.blogspot.com/2011/06/another-unfinished-project.html

Barbara

Monday, June 6, 2011

Gourd and Paperclay Apple Tree!

I really hope that all you folks really like the "Apple Tree" that I've made! I've had this idea for awhile but haven't taken the time to make it until now. Well for starters, I have several spindles cause I purchased a whole box of them at a Habitat for Humanity thrift store about three years ago. So.... I attached the spindle to a wooden base that I had purchased at Hobby Lobby. ( You don't have to use a spindle, you can use a piece of broom handle or big dowel rod). Then the spindle was attached to a very large apple gourd which I had picked out and been hanging on to for just this purpose:


Pretty neat huh? I used glue to attach them and let it set overnight. Once all that was started I used dye to color the gourd ( I used red and cordovan) and sealed the dye. I then used aluminum foil to make a base trunk for the tree. I also used a candy mold to put paperclay into for the leaves and let them set overnight to dry. This is the beginning:

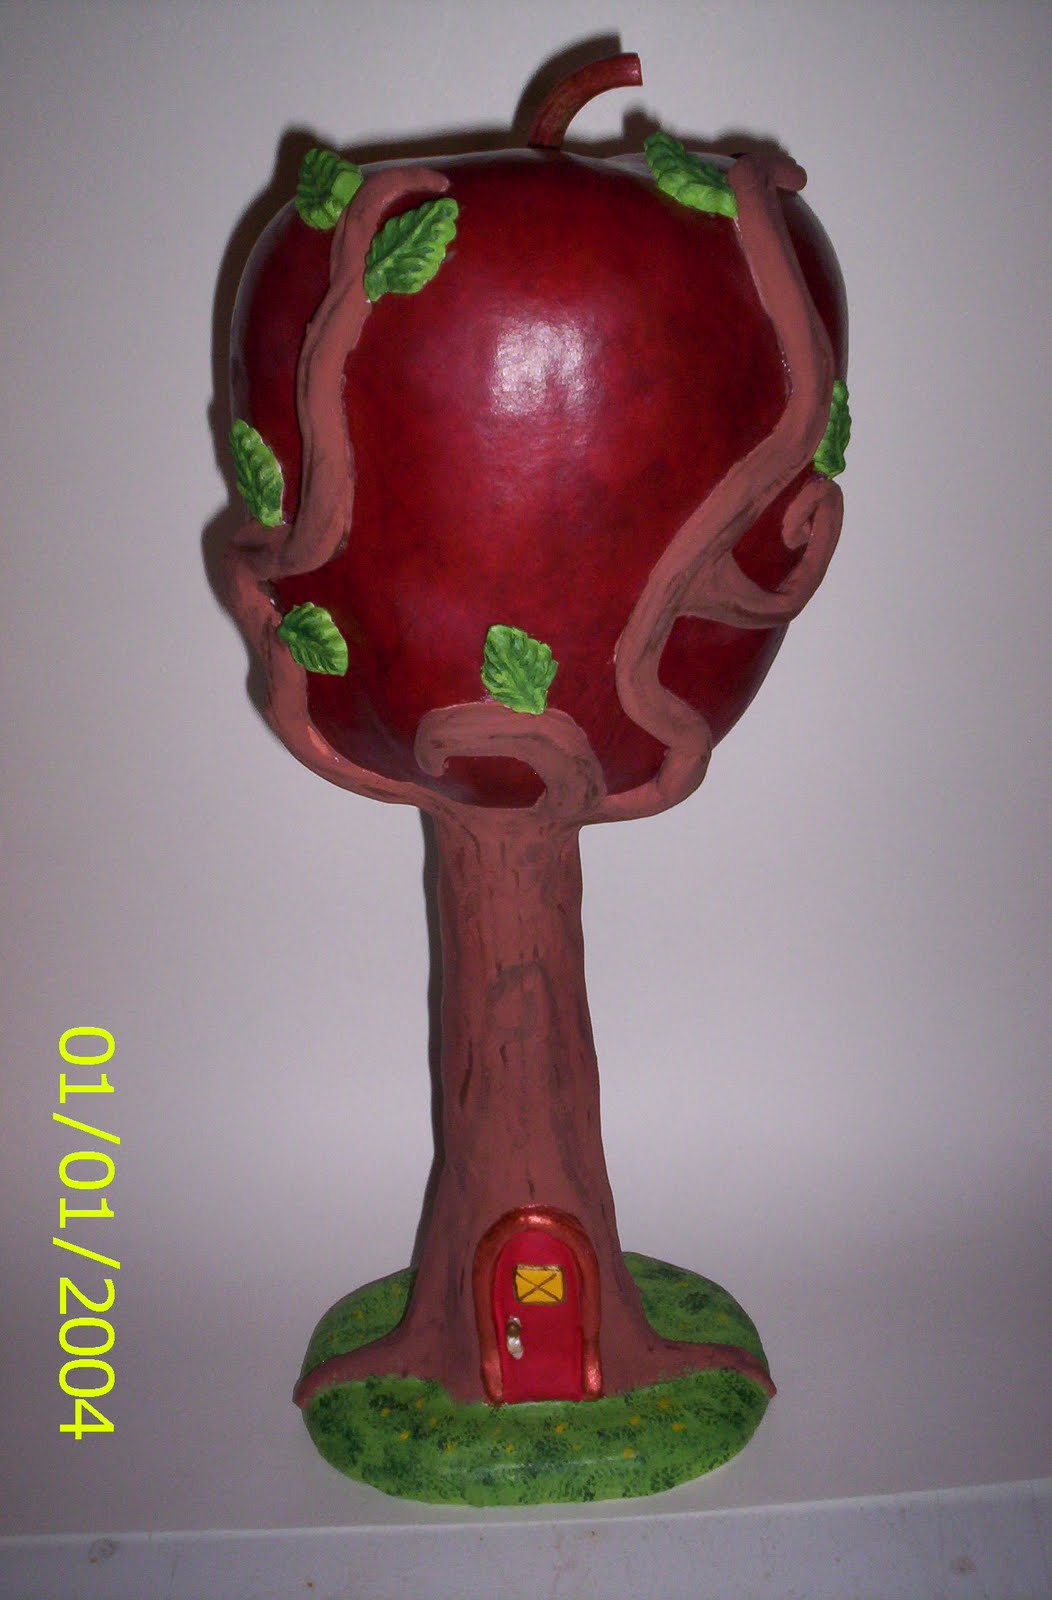
Doesn't that color on the apple look real? Looked like a red delicious to me. Once the ground work was done I got to have the real fun! "Creative Paperclay" to the ready.... I then covered the base, trunk, and made the limbs of my "Apple Tree". To me it looked pretty neat even without the paint. I then glued my leaves on after sanding the edges of them to make them look good and also made a little gnome door on the front and left my project overnight to dry.

I was just so excited after I got the project this far. Now that everything was dry I painted my "Apple Tree" and then sealed it well so that it would last a very long time.


So tell me, what do you think? I love it and don't think the picture really does it justice. I can certainly tell you that working with Creative Paperclay is fun, fun, fun!!! You can purchase Creative Paperclay at a lot of hobby and craft stores like, Michaels and Hobby Lobby to name a few or from the creator of Creative Paperclay, Amaco. I hope you purchase some and try a project or two yourself, I know you'll like it.

Barbara